
Figuring out your Patagonia packing list is not for the faint of heart. You have to be prepared for extreme wind, unpredictable rain, and rapidly changing temperatures all in the exact same afternoon.
I’ll be honest that I might have panicked a bit as I prepped for this and overthought it just a touch. The good news is that I figured it out and felt really good about what I chose to bring, so learn from my experience.
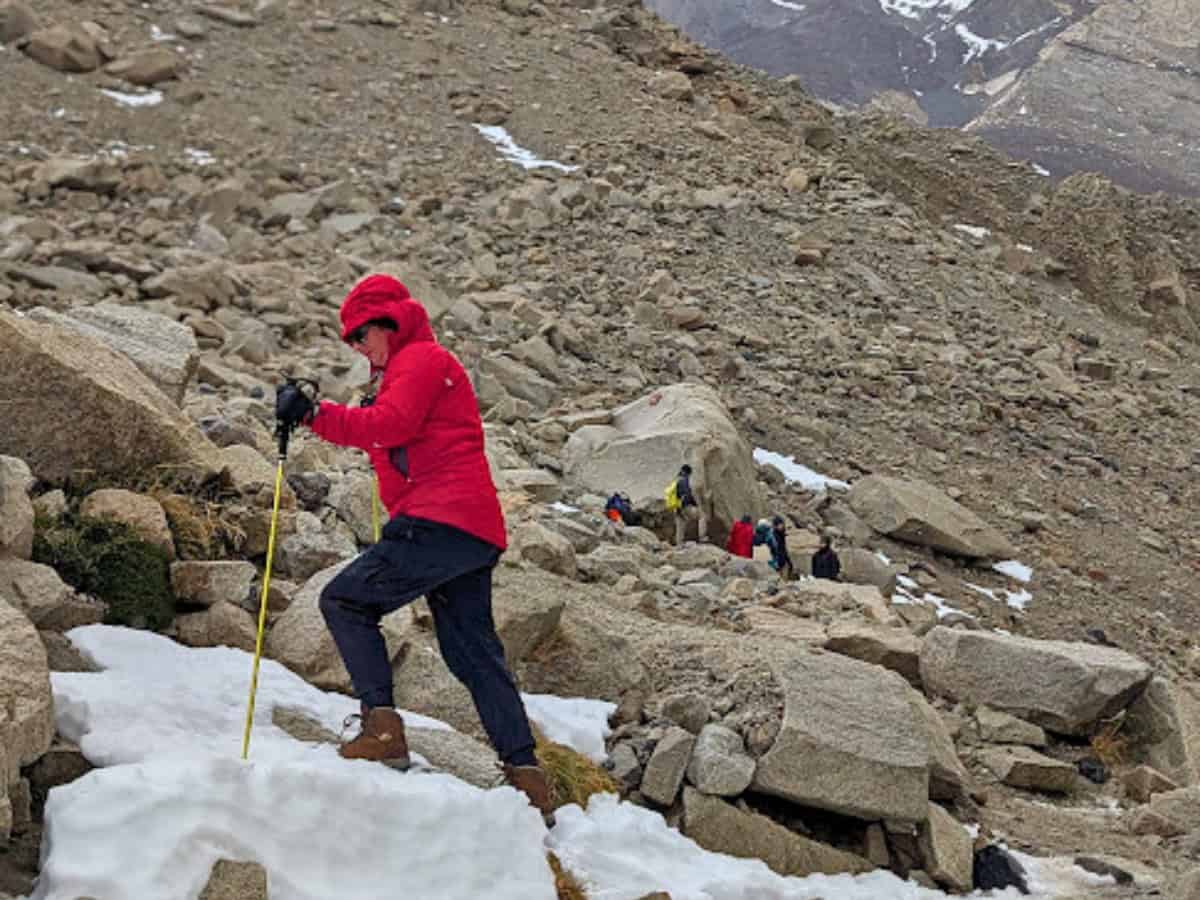
When you visit a place like Torres del Paine, you quickly learn that the usual rules for packing don’t exactly apply. The wind there is no joke and can easily knock you off balance and chill you to the bone if you’re not prepared.
Because you can experience all four seasons in a single day, mastering the art of layering is the only way to stay comfortable. You need windproof items to cut the biting chill, waterproof outer layers to survive sudden downpours, and wicking base layers to keep your sweat from freezing as temperatures drop.
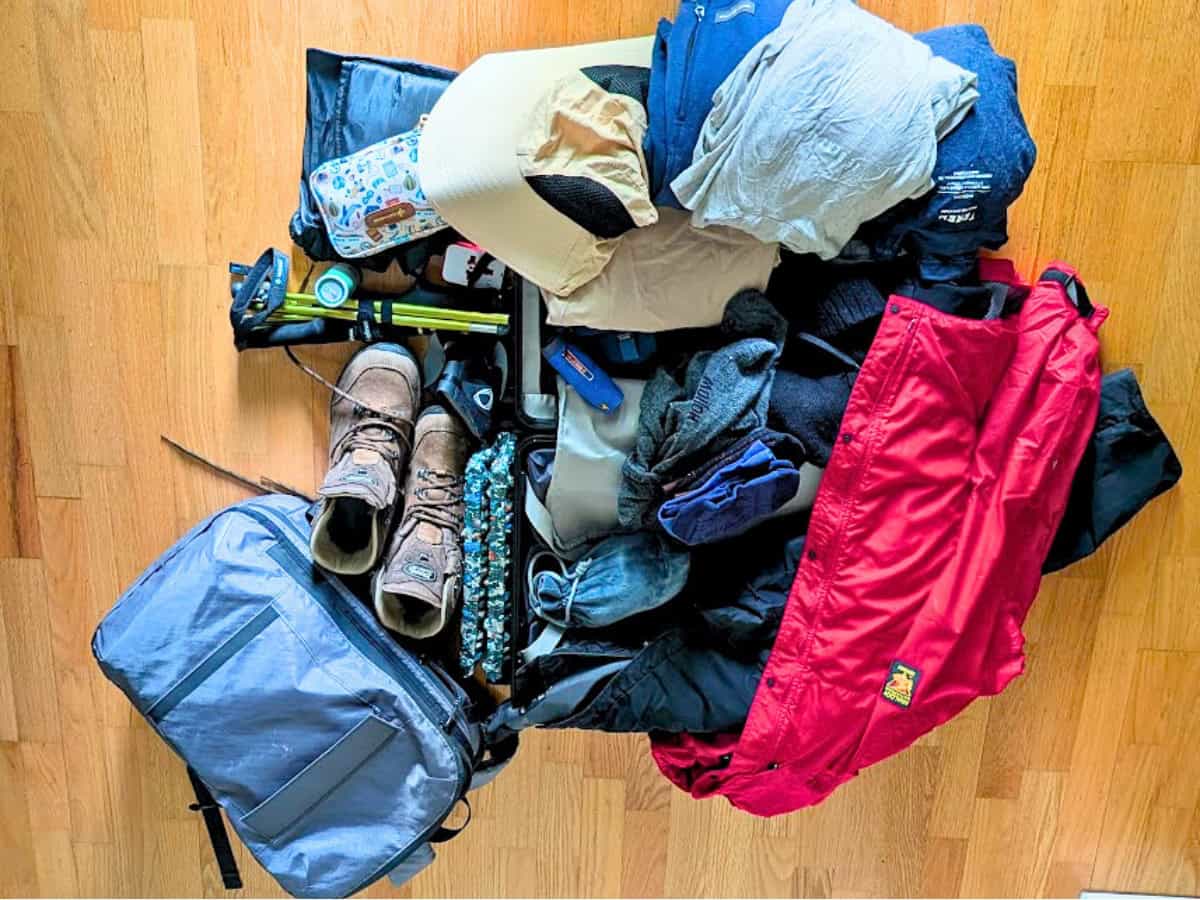
I packed for a week in Patagonia using just a carry-on and a backpack, and choosing the right gear made all the difference in the world. But that also meant finding the right carry-on and backpack because not every one I have would work.
I received some of these products as samples from brands to test, but I also purchased many of them myself. I only share products I will use and love.
Some links in this article are affiliate links that may earn me a commission if you purchase through them.
Choose The Right Luggage For The Journey
Finding the right bags to carry all your gear is half the battle when packing for a remote destination. You want luggage that is durable, spacious, and easy to maneuver through airports.
A Vacuum Compression Carry-On
I tested out a new-to-me carry-on for this trip, and the Airback NEXT suitcase may be my new favorite. I would never have been able to fit everything into a backpack and carry on for this trip if I didn’t have the vacuum compression side of this bag.
It took all my soft clothing and squished it down in the best possible way. The suitcase isn’t light, even before I add more items than I can usually fit in my carry-on, but it wheels beautifully and is incredibly easy to maneuver.
The wide handle took a bit of getting used to, but it made maneuvering easier and allowed more space inside the suitcase. That said, the wide handle style means I had to reconfigure how I attach my backpack to the carry-on, but it worked out.
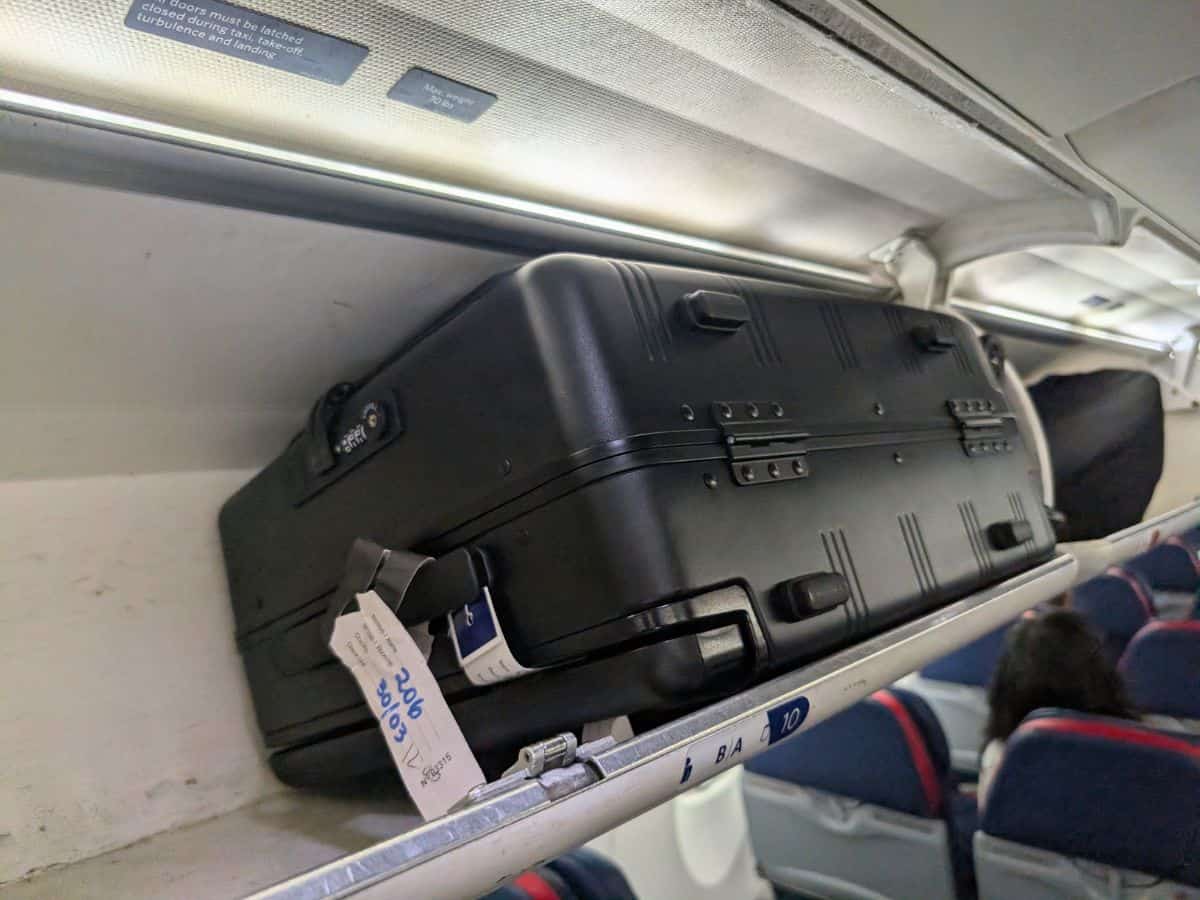
This suitcase is also very compact and actually fits in the overhead bin on a regional jet, which is no small feat. It even met the LATAM size requirement, which is much stricter than that for domestic flights.
A Spacious Personal Item
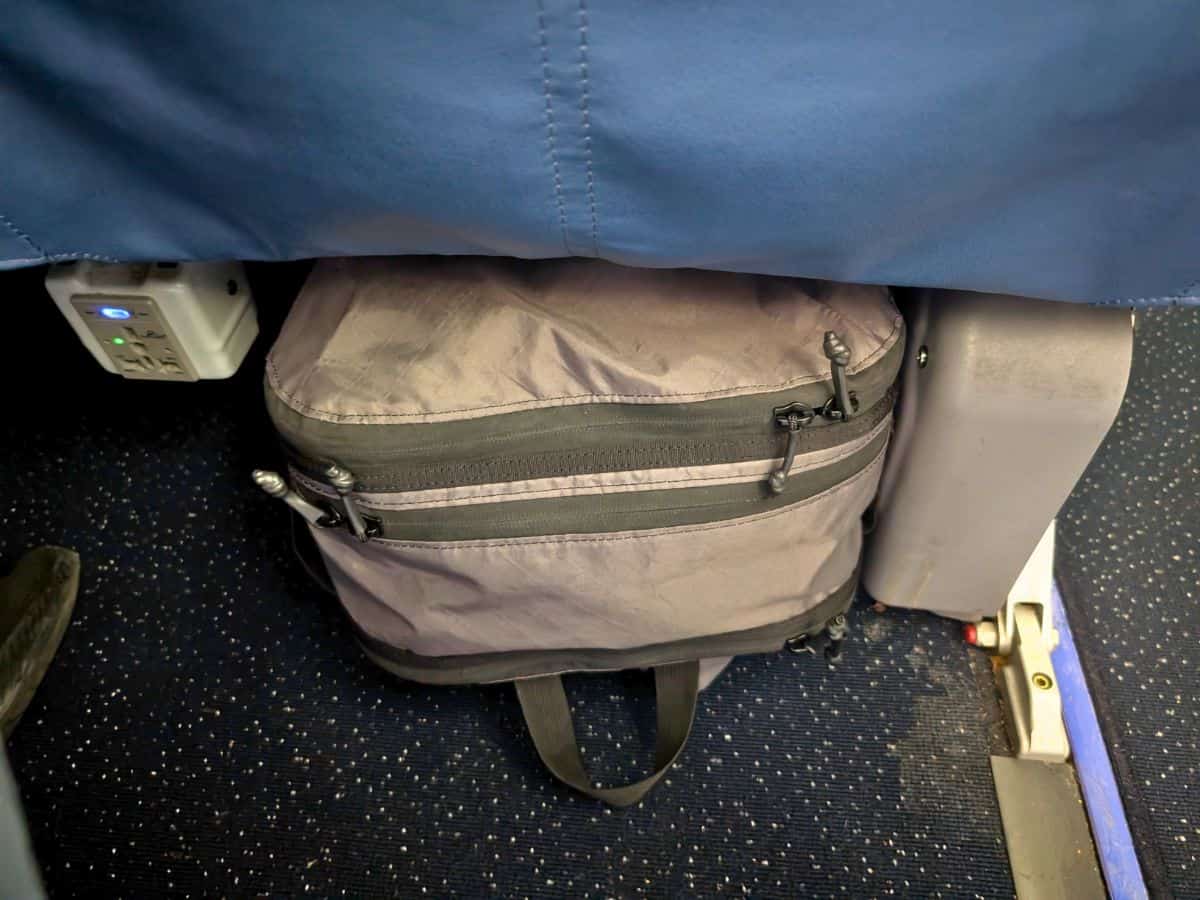
My personal item was the Mission Workshop Meridian Backpack, which surprised me by how much I fit inside. It has plenty of pockets and three main compartments, including a padded laptop compartment that kept mine safe and secure.
It stuffed it to the gills, but it somehow still slides right underneath an airplane seat. I slid it under everything from a regional jet to a standard domestic flight to an international plane, and it fit just fine everywhere.
I love the different pockets so I can keep things organized and only pull out exactly what I need, whether that is my snacks, my passport, or my foot hammock. It slides easily sideways onto my usual rollaboard, and I pretty readily finagled a solution to attach it to the Airback NEXT suitcase as well.
The only thing it’s missing is an exterior pocket for my reusable water bottle, but I carry a carabiner on the strap, so I just used that. Oh, and even packed full, it distributes the weight well, so it felt comfortable to wear on my back.
A Packable Daypack
I used the Tripped Foldable Daypack for my daily excursions. I brought this daypack on my Amazon river cruise previously, and it is perfect.
It’s small enough to fold up and take up minimal space when I don’t need it, but it’s big enough to carry my water bottle, extra layers, phone, and portable charger, among other items.
It is water-resistant, which is important in Patagonia, and it was much more comfortable to carry than the standard dry bag that Hotel Las Torres provides its guests. It has multiple pockets, too, so I can find things quickly, something I love in all my backpacks (and pants).
Packing Cubes
You always need packing cubes when you’re trying to travel light. The Mission Workshop Cubes are designed to fit perfectly inside their backpack, and I used them to squeeze in everything I didn’t want to get lost, just in case the airline made me check my carry-on for a leg.
They actually did force me to check my bag for the flight from Santiago to Punta Arenas, so I was glad I had my electric toothbrush, changes of clothing, and pajamas safely in my backpack. I fit a lot more into that packing cube than I otherwise would get in the backpack, and it kept my clothes from flying out when I opened my bag.
Layer With High-Performance Clothing
Your outer shell and base layers are your most important defense against the extreme elements you face on the trails. Many of these clothes are ones I wear only for more extreme adventures, but I find that some I continue to wear even now that I’m home again.
A Waterproof Rain Jacket
I brought the Paramo Velez Jacket, and I was so glad I had it. Paramo is very popular in the UK, but the brand is less well-known in the States.
The product is made by an employee-owned trust that does most of its manufacturing in a factory run by a foundation that provides training and employment for vulnerable women in Colombia. I love supporting ethically-sourced and sustainable companies whenever I can.
Instead of traditional waterproof materials, the jackets are treated with a PFAS-free Nikwax that works incredibly well. I was outside in the rain on horseback for nine hours one day, and the only part of me that got wet was my shoulders, where my backpack straps rubbed the water into the jacket as I rode.
This jacket runs a little small compared to what I am used to, so consider sizing up if you plan to layer under it. I love all the different pockets it has and the clever ways you can vent heat as you start to warm up while trekking.
I used the hood in both the wind and the rain, and I feel like it was tight enough to keep my sunglasses in place while still being comfortable to wear. I witnessed a pair of sunglasses go flying off a person’s face, and she chased them but never caught up – I can’t afford to lose my sunglasses.
Waterproof Rain Pants
In Patagonia, you never know when it will rain, so I packed my Paramo Cascada II Trousers in my daypack every single day. I was lucky enough not to need them except for the last day, but I was so glad I had them.
I layered them right over my trekking pants when it started to really pour. They kept me warm and dry, which is something my guide and the local baqueano weren’t so lucky with, as they were both pretty soaked.
I love that they aren’t bulky and don’t make the annoying swish-swish noise as you walk, plus, they vent to keep you from overheating. These also run a little small, so definitely consider sizing up if you plan to layer them over other pants.
Moisture Wicking Thermal Layers
Thermal layers are critical, and you want something that is comfortable and wicking. I brought multiple styles and types to make layering easier, ranging from short-sleeved shirts to zip-up hoodies.
I was really happy with all of them, and feel comfortable bringing along the Artilect Quandary Peak Hoodie, the Le Bent Nuyarn Ultralight Hoodie, or Teren Traveler Tees. Technically, the Teren Traveler Tees are men’s tees, since their women’s line isn’t available yet, but they worked great for me.
I wore these three products regularly and would layer one atop the other when I started the day, removing layers as needed. They all have different uses, from the short-sleeved tee from Teren to the zipped hoodie from Le Bent that I could open and close to regulate my temperature.
The weather changes fast depending on the wind direction, whether the sun is out, and how hard you’re working. I traveled in the fall when the temperatures were typically in the 40s, and I generally wore three layers to start each day, plus my outer shell.
Insulating Silk Thermals
I also brought a pair of silk thermals, and I’m so glad I did. There were days when it was cloudy and drizzling, and did I mention that it didn’t really get out of the low 40s?
Having that thin layer of silk under my trekking pants and base layer kept me toasty without overheating. The silk material fits easily under my shirts and pants without creating too much bulk.
Versatile Trekking Pants
You definitely need a few pairs of dedicated trekking pants for this trip. I packed several pairs in varying weights so I could choose the right ones depending on the day’s specific weather.
On the colder, rainier days, heavier trekking pants provided a great barrier against the wind, while my lightweight, vented pants were perfect for the strenuous hike up to Base Las Torres when the sun cooperated a bit more.
Every one of them is water-resistant, which also helps keep the wind from being an issue. Having options means you are never stuck sweating in heavy gear or freezing in thin material.
I purchased most of mine on Amazon, and they all worked well. I chose various colors because I could, and I appreciate that you have that option.
- Lightweight cargo pants
- Quick dry hiking pants with 5 pockets
- Hiking pants with adjustable cuffs to help keep bugs out
Protective Sun Hat
You need to protect yourself from the sun when hiking for hours in Torres del Paine, and the best way to do that is with a sun hat that includes a neck flap. This is one of the things I so wished I had for that Amazon trek, and I am glad I bought one to pack for Patagonia.
This hat has vents so I don’t get too hot, and it’s size-adjustable so it fits just about anyone and stays in place even in that ridiculously strong wind. The neck flap protects the part we all forget about so you don’t end up sun- or windburned.
It rolls up well, so it doesn’t take up much room in your suitcase. I picked the standard beige color, but it comes in a rainbow of options to best suit your personality.
Select The Best Hiking Footwear And Socks
Keeping your feet comfortable, dry, and blister-free is one of the most critical parts of enjoying Patagonia. Between the grueling travel days to reach the southern hemisphere and the unstable, rocky trails in the national park, you need specialized support from the ground up.
Comfortable Hiking Boots
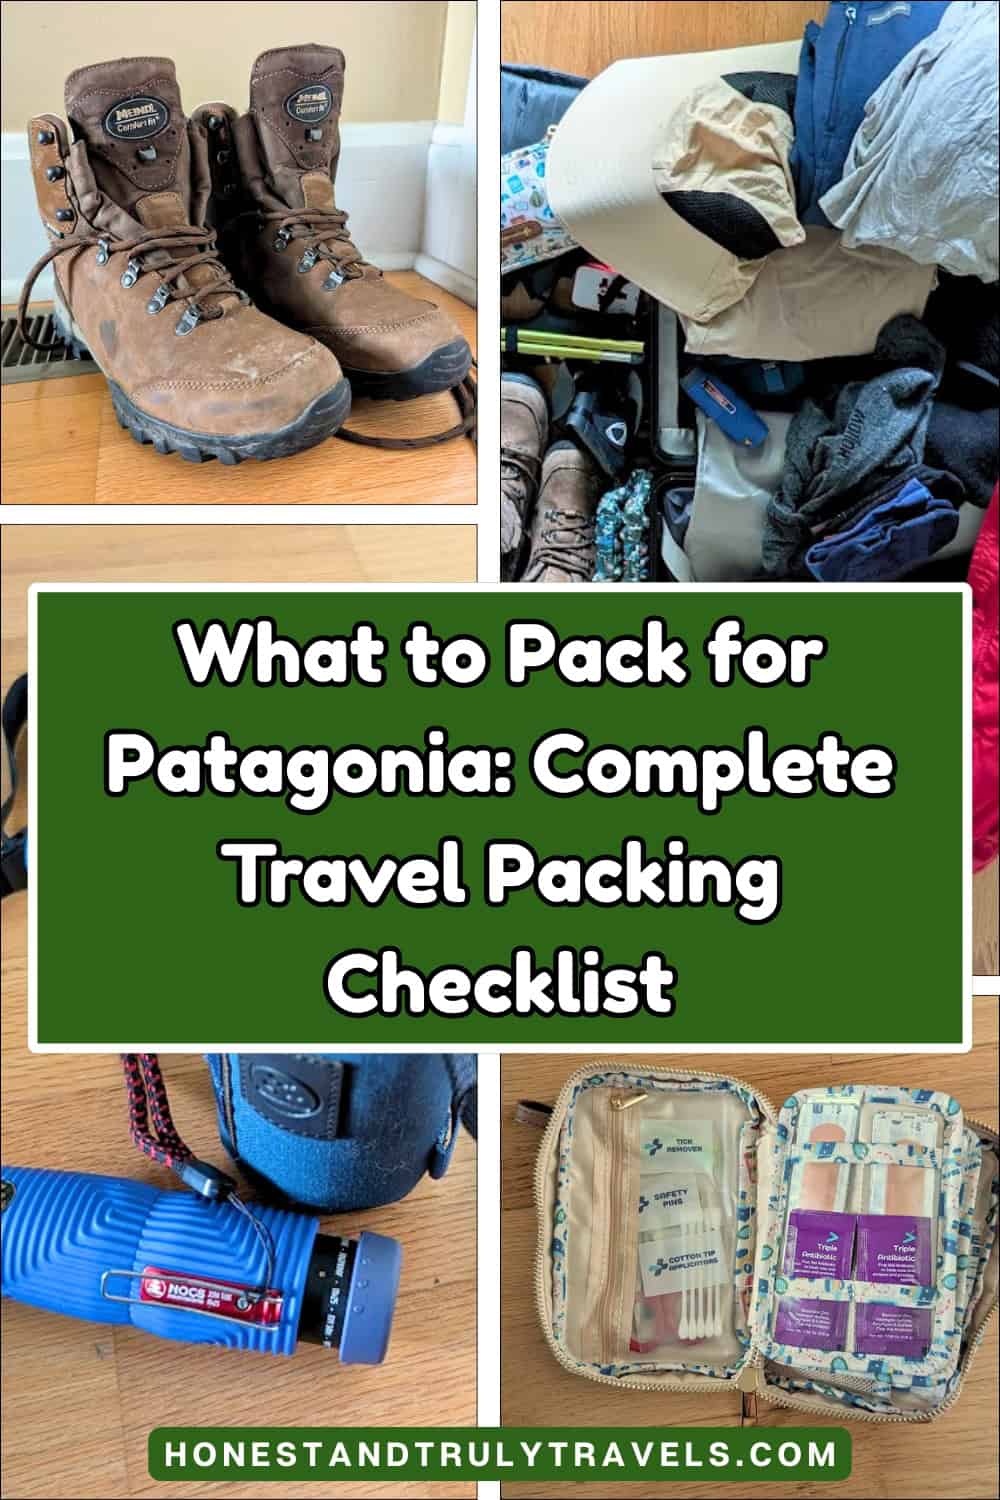
I have hiking boots, but I’ve never worn ones as comfortable as the Meindl USA Lady Comfort Fit Meran Light Hiker. These boots are well-designed and waterproof, and they will last for years of heavy use.
They arrived the day before I left, so I didn’t have a chance to break them in, but they are so well designed that they truly don’t need a break-in period. On day one, I wore them on a three-hour hike with zero issues.
I specifically chose a hiking boot over a hiking shoe because I know I tend to let my ankle give out and strain it. I was really grateful for that extra support with the rain we faced, the snow we trekked through, and the unstable rocks we clambered over.

If you have extra room in your suitcase, think about bringing a lightweight hiking shoe, too. That lets you trade them out depending on what you’re doing that day, since even though these are lightweight hiking boots, they’re still significantly heavier than lightweight hiking shoes at the end of the day.
My favorite design feature is that the tongue of the shoe is attached on three sides rather than just at the bottom, which means there was no way water could get into my boot. They fit well with my socks, and my feet never felt too hot or cold, which I appreciated.
High Quality Hiking Socks
Finding the right socks is so important to avoid blisters from all that heavy hiking. I used the CEP light merino compression socks for hiking, along with Hollow Socks trail, run, and crew socks.
They were fantastic for me because my feet never sweat, and the soft material cushioned me well. The CEP socks are made from merino wool, and the Hollow Socks are made from alpaca, so they wick moisture away and really are so comfy.
Hollow Socks are designed to be worn over and over without smelling, and I tested that theory. That means you can pack a little lighter, knowing you can wear them more than once without washing.
A Supportive Ankle Brace
If you have a bad habit of rolling your ankle, as I do, you also want to pack an ankle brace to help stabilize it before something happens. I brought the BetterGuard Lite to wear when clambering around over rocks and boulders all day, especially as I got more tired towards the end of the trip.
I asked my chiropractor about this before I packed it, and he actually has these same ones for his son to wear when playing basketball. This brace is small, easy to pack, and really helps support natural movement.
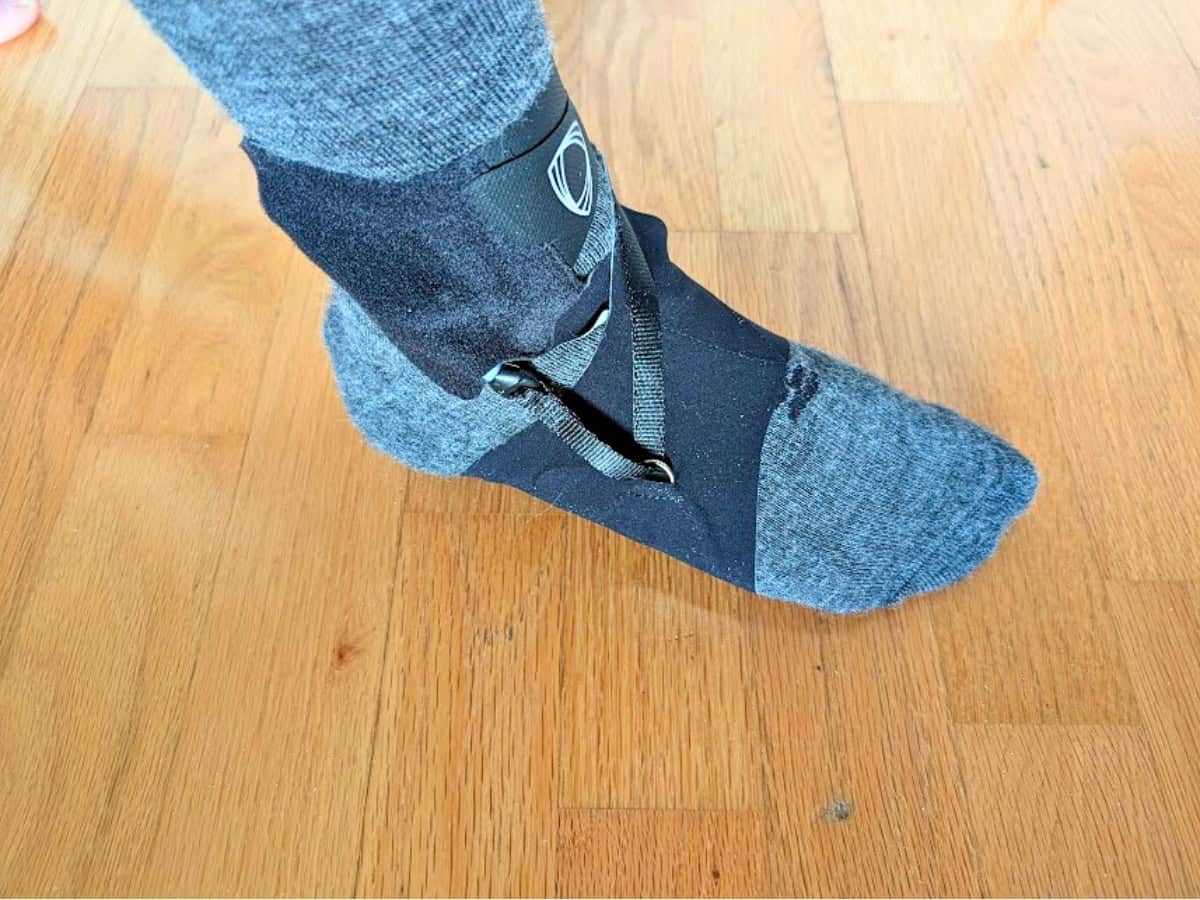
You do have to choose either right or left foot (or both), so know which side tends to be your weak one. This worked really well to ensure my ankle moved naturally as I hiked and reacted quickly to support it when it started to roll.
This slides easily onto your foot, and you don’t have to figure out which strap goes where. Even better, it’s so lightweight and small that it fits inside my shoes without being uncomfortable at all.
Protect Your Extremities In Extreme Weather
The sun and wind in Patagonia are incredibly intense, so you have to protect your exposed skin and extremities from the harsh conditions. Most of these you already have at home, so don’t forget to pack them.
Mineral Sunscreen And Lip Balm
Your skin will burn and dry out in no time flat, even in 40-degree weather. You need to pack plenty of lip balm and keep reapplying it, because it is surprising how quickly your lips can get chapped.
And of course, you know the rule about wearing sunscreen even when it isn’t sunny or you aren’t sitting on a beach. Even though you may stay mostly bundled up, your hands and face can get easily burned with the strong sun.
I prefer mineral sunscreen for so many reasons, including that it tends to be more environmentally friendly, and I can’t imagine someone trying to do the spray can here and having it work well. This is one of my faves anywhere I go, as it absorbs easily, lasts longer, and works better for me.
Pro tip: Get the full size and then put it into TSA-approved liquid containers for travel. I’ve been using mine for over a decade, and they’re still in great shape, and it saves me so much stress and money.
A Winter Hat
You also need a hat to hold your body heat in that won’t blow away. The winds can be fierce, so you want a tight beanie-style hat without any fun pieces that may catch the wind.
I think we all have a good winter hat at home, but I will note that I went for my thicker one and left the one with the cute puffball on top at home. Mine is fleece lined that keeps me warm and also keeps the water out.
Touchscreen Thermal Gloves
I brought thermal gloves that are relatively thin but still retain a lot of heat with the fleece lining. When you’re hiking and horseback riding, you want to be able to move and feel your fingers, so thick gloves or heavy mittens just don’t work.
The ones I brought are touchscreen-friendly, so I could pull out my phone and take photos without having to remove my gloves. Because they’re also water repellant, they kept my hands warm even when I was riding in the freezing rain for hours while my poor guides’ hands were freezing through their less effective gloves.
Pack Essential Trail Gear
Once you have your clothing sorted, make sure you have the right tools to keep you safe, comfortable, and hydrated on the trails. Some of this, I didn’t think to pack at first, but I’m so glad I had it all – except the umbrella. Bringing an umbrella was silly, so don’t do that.
Lightweight Trekking Poles
Trekking poles are a complete must if you are doing any serious hiking in Torres del Paine. When we did excursions from Hotel Las Torres, they had poles we could use, but I prefer to know I have lightweight poles I can pull out if I hike on my own.
I used Helinox Passport series trekking poles, and I loved how they fold up compactly to make them easy to carry both in a daypack and in my suitcase. They held up incredibly well, even when I had them stuck between two rocks when I slipped going too fast at one point and was sure I was going to bend the poles.
Note that you generally cannot take trekking poles in your carry on luggage. Security might have missed mine when I went through because they aren’t the usual shape for poles, but you should probably plan to check them.
A Wildlife Monocular
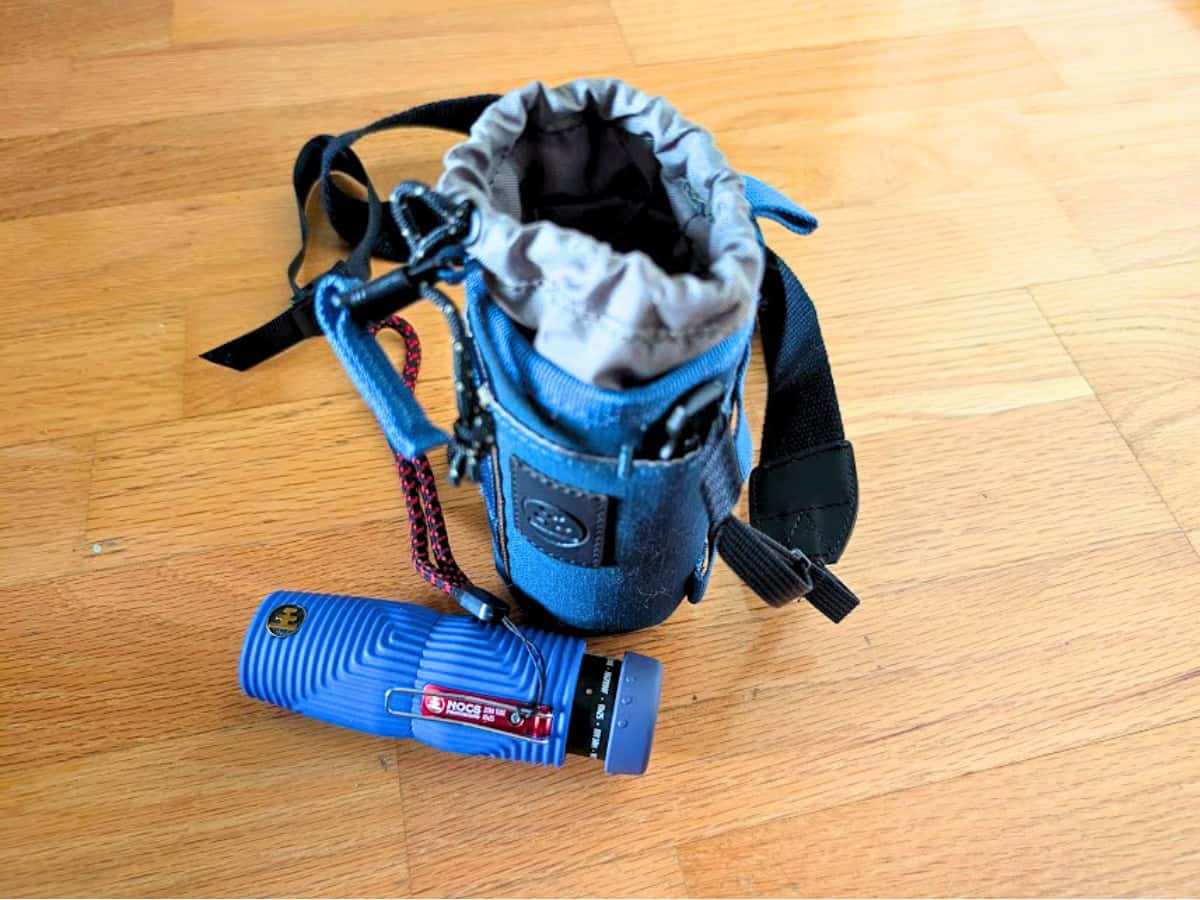
With all the unique animals in Patagonia, you want to have a monocular to help you see them close up. I brought the Nocs Provisions monocular, and it was perfect to spot the condors far overhead, bring the flamingos into closeup, and really feel like I was standing next to the animals.
It’s much smaller than traditional binoculars and really performs well, so I ended up sharing it with others travelers on more than one excursion. It has a carrying case, but you can also hook it directly onto your clothing or backpack.
This is another of those things I so wish I’d had when I was on the Amazon cruise and the guides were pointing out the critters hidden in the jungle. I know I missed out there, but I didn’t in Patagonia!
A Foldable Kneeling Pad
Taking breaks is part of hiking, so I brought a folding kneeling pad called The Chipper. This is something I didn’t intitially plan to bring, but I used it more than once.
When we went to Base Las Torres, we were hiking in the snow and it had been raining several days previously. We stopped to eat lunch by the lake, and this foldable pad gave me a dry layer to sit on so I didn’t absorb the cold or wetness from the snow.
The day it poured rain during my all day horseback riding excursion? It was the perfect solution to pull out when we stopped for lunch and only had muddy ground to sit on.
A Collapsible Water Bottle
I carry a silicone reusable water bottle on every trip I take. It doesn’t keep water cold as long as an insulated metal bottle does, but it does a decent job, and I tend to drink my water quickly anyway.
It doesn’t leak, and I love how it folds up when it is empty so it doesn’t take up much room or weight in your bag. I bought mine years ago, and it always amazes me how often I get stopped in the airport as I fill it with people asking me about it.
A Travel First Aid Kit
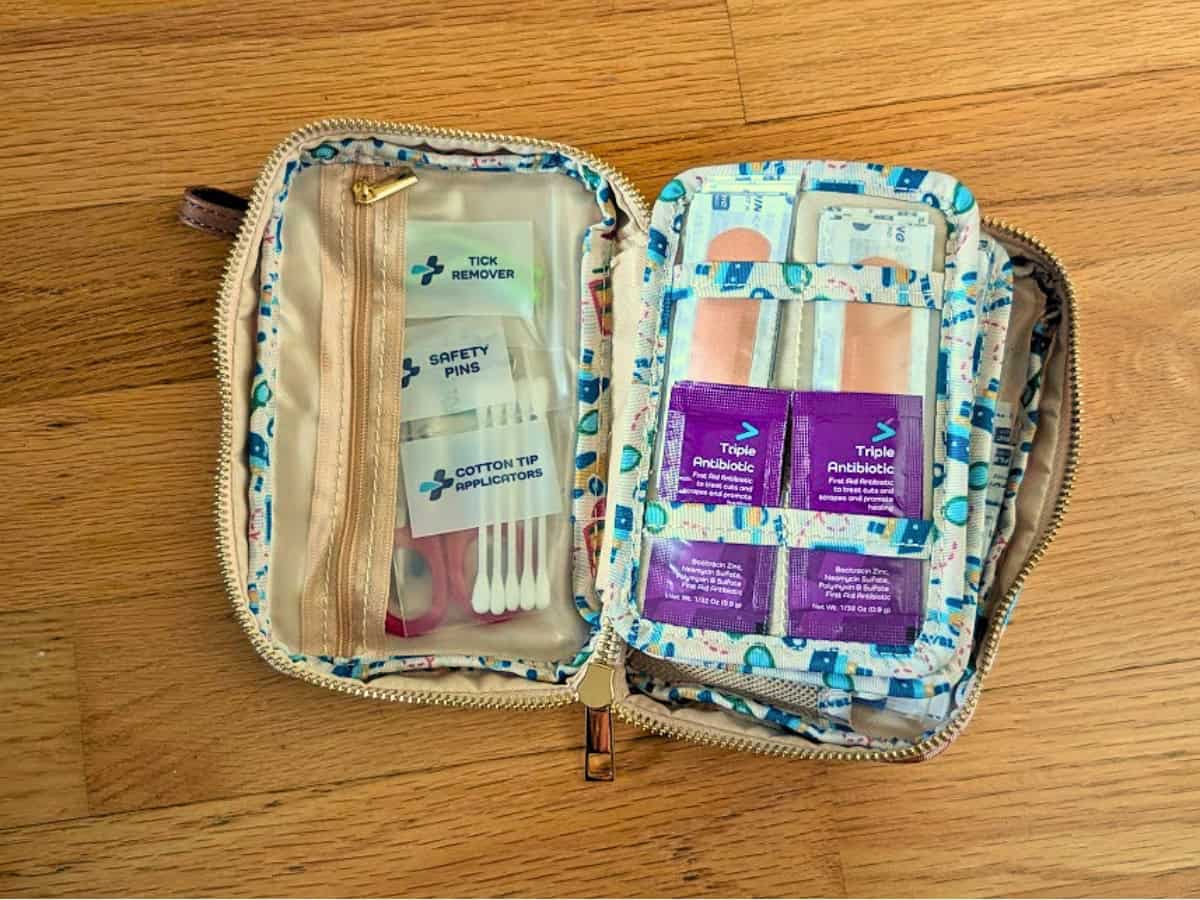
While the guides always bring their own first aid kits, I felt safer knowing I had the Keep Going First Aid Adult GoKit with me. I love the design I chose, and it is perfectly sized to take just about anywhere.
This kit goes way beyond standard bandages, featuring anti-itch cream, carry-on-approved small scissors, a compressed towel, nosebleed plugs, and so much more. It’s well organized, and there’s still room for me to add my own personal items like my migraine meds, an EPI pen if you carry one, or anti-inflammtory meds.
This lives permanently in my travel backpack now so I never forget to grab it. I love vacations where I’m active and doing fun things, and I don’t always emerge unscathed.
A Reliable Portable Charger
Finally, you never want to get stuck running out of phone battery. While there is no cell reception anywhere outside the hotel, you will take a ton of photos and videos. Had I spotted that elusive puma, I would have been crushed to not capture it just because my battery died.
A portable charger is also crucial for the extremely long travel times to get to and from Patagonia, and it completely saved me on the way home when my 30 hour trip was extended by several hours due to flight delays.
This is my go-to charger. It charges quickly, and I can get multiple charges from it. I love how small and light it is, too.
Simplify Your Personal Items
Traveling with just a carry on means you have to be very strategic about your liquids bag, and finding solid alternatives is the best way to save space. Well, that and being smart about what you choose to bring.
Universal Power Adapter
No surprise, the plugs in Peru are not the same as the ones in the States. And they’re not the same as European ones either, so you need a universal adapter.
While your hotel may have US power supply or USB charging, you likely won’t have that at the airport. And honestly, this is one place where it’s better to be safe than sorry.
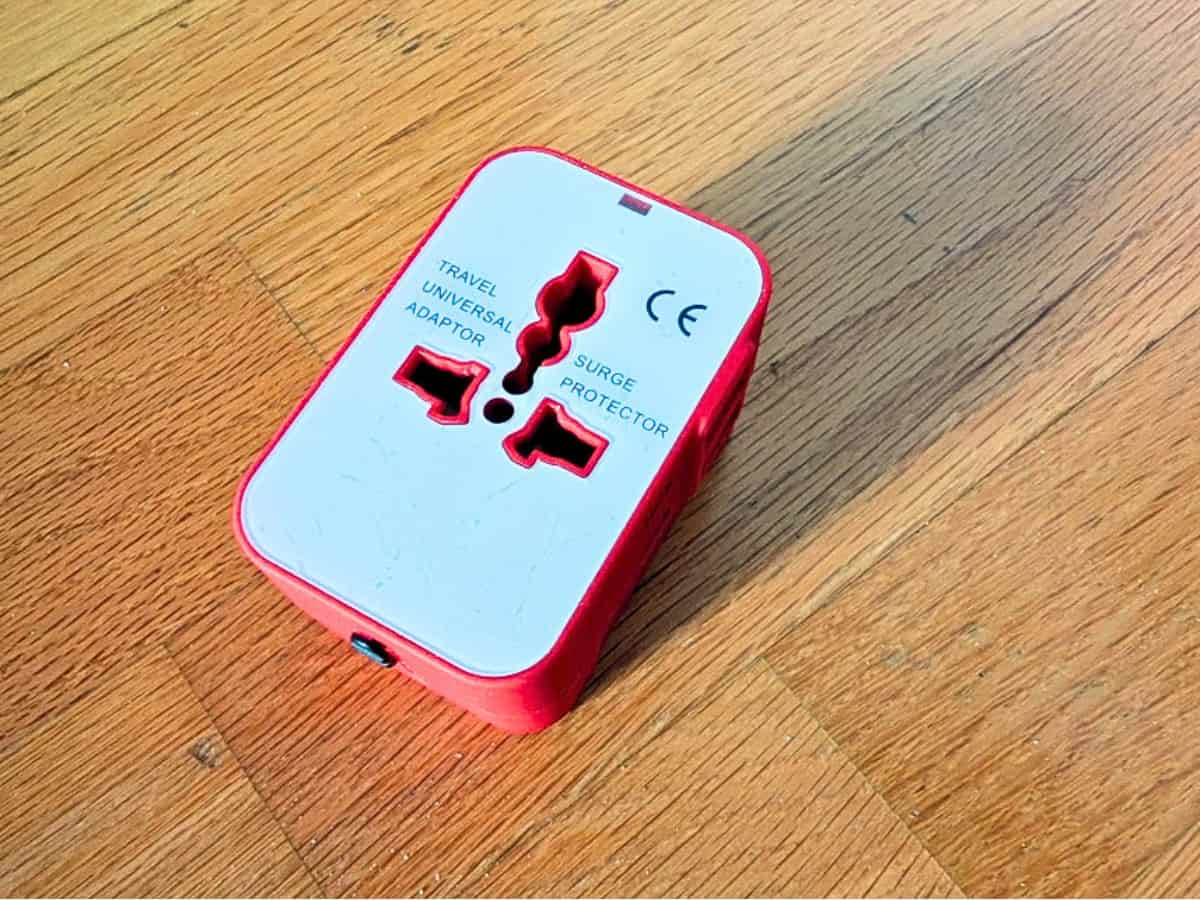
Because so many different countries have different power standards, I bring a single universal adapter. That way, I don’t have to try to figure out which one to bring on a trip and accidentally have the wrong one.
Note that this is not a voltage adapter, and I do not recommend bringing your own hair dryer, etc. They will burn up your devices and ruin them, so you’re safer relying on what the hotel offers or buying one in country.
Solid Bar Shampoo And Conditioner
I never trust hotel shampoo and conditioner. So often, it doesn’t work for my hair or – worse – they have no conditioner or shampoo that doubles as body wash.
Needless to say, I always pack my own, and I use it probably 60 percent of the time. To save valuable liquid space in my TSA liquids bag, I always travel with bar shampoo and conditioner.
I use HiBAR and really love them, especially the carrying case that keeps them from making a mess or dissolving in the shower. They make different formulas depending on your hair type, so I have the curly hair one, and it works great.
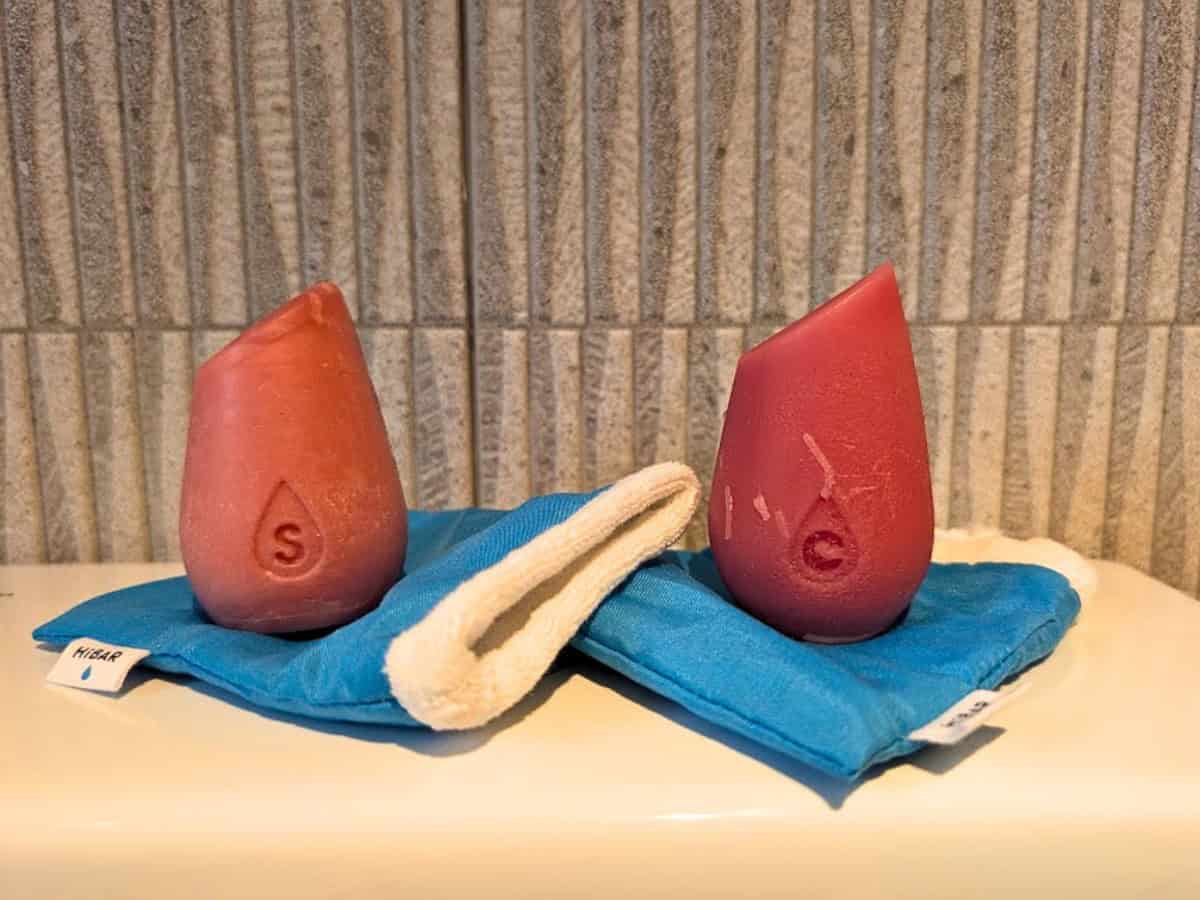
I like bar shampoo and conditioner so much that I use them at home, too. They last a long time, and they’re easy to use.
Chewable Toothpaste Tablets
In my quest to reduce liquids and be more environmentally friendly, I also started using chewable toothpaste from The Humble Co. I have the fresh mint version with fluoride to protect my teeth.
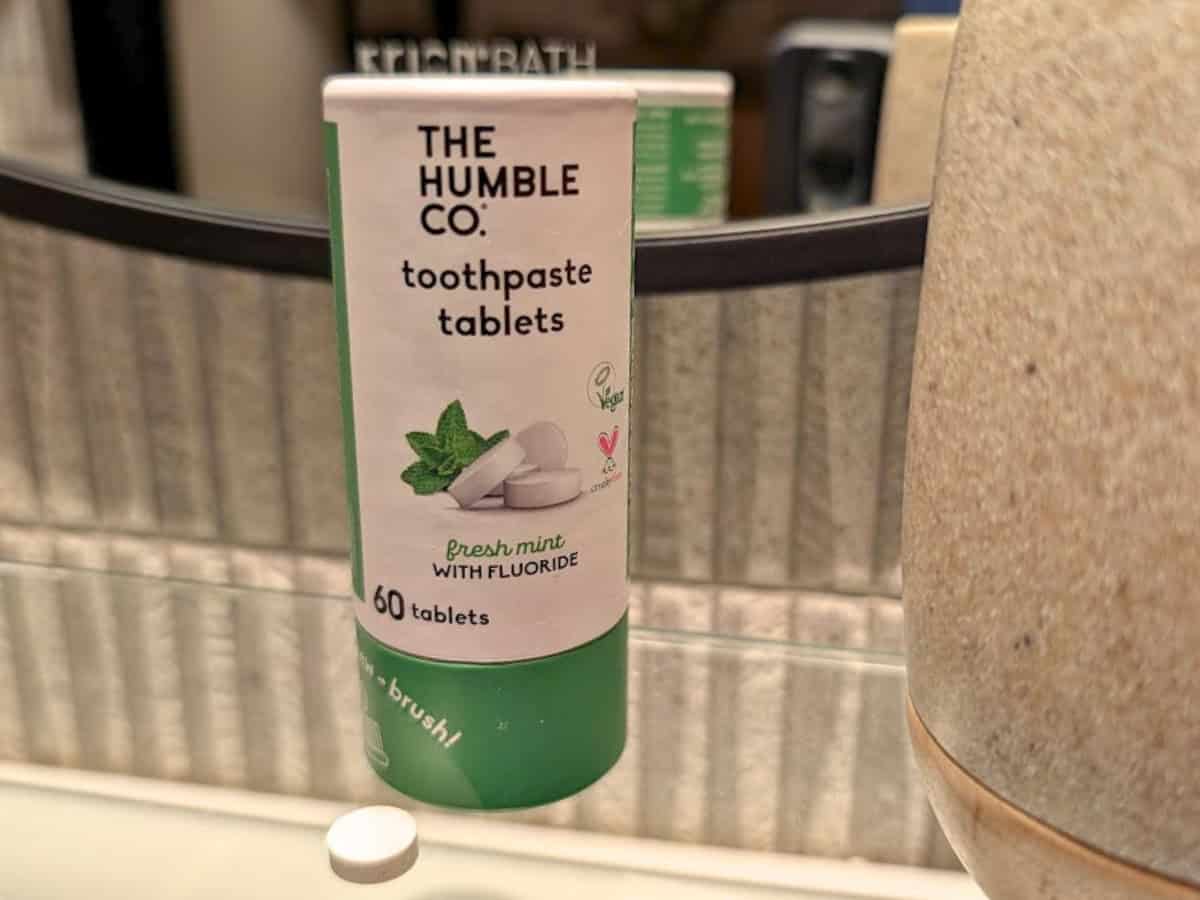
This is another one that I use at home and not just when I travel. It isn’t as strong of a mint taste as most toothpastes, but it works perfectly.
It takes a little getting used to. You just chew it into small pieces, use a wet toothbrush like normal, and spit it out when you are done.
TSA Approved Liquid Containers
Using solid shampoo and toothpaste means I can use my quart size TSA approved liquids containers for other important things. I put my mineral sunscreen in one, hair products in two others, and lotion in a third.
I add that to my travel size makeup remover and face wash bottles that I refill from my stash at home. This setup fills my liquids bag without me having to buy expensive travel size items, and I still get to use all my favorite products from home.
The ones I love are all different colors so I know green is the sunscreen, for example. They don’t spill, and the lids also have labels so I know what’s what if I do forget.
Stay Comfortable on the Plane
I’ve flown enough that I finally figured out exactly what I need to bring to ensure I’m comfortable on the plane and rested once I arrive. The trip to Patagonia is a long one, and you don’t want to arrive exhausted or sore.
Plane Hammock
This is one of my more recent purchases, but I’ve been using this foot hammock on ever flight over a couple hours for the last year plus. Honestly, it makes a big difference, and people ask me about it every time.
The idea behind this is that having your feet slightly elevated and more able to move reduces the stress on your back and reduces soreness. And it does.
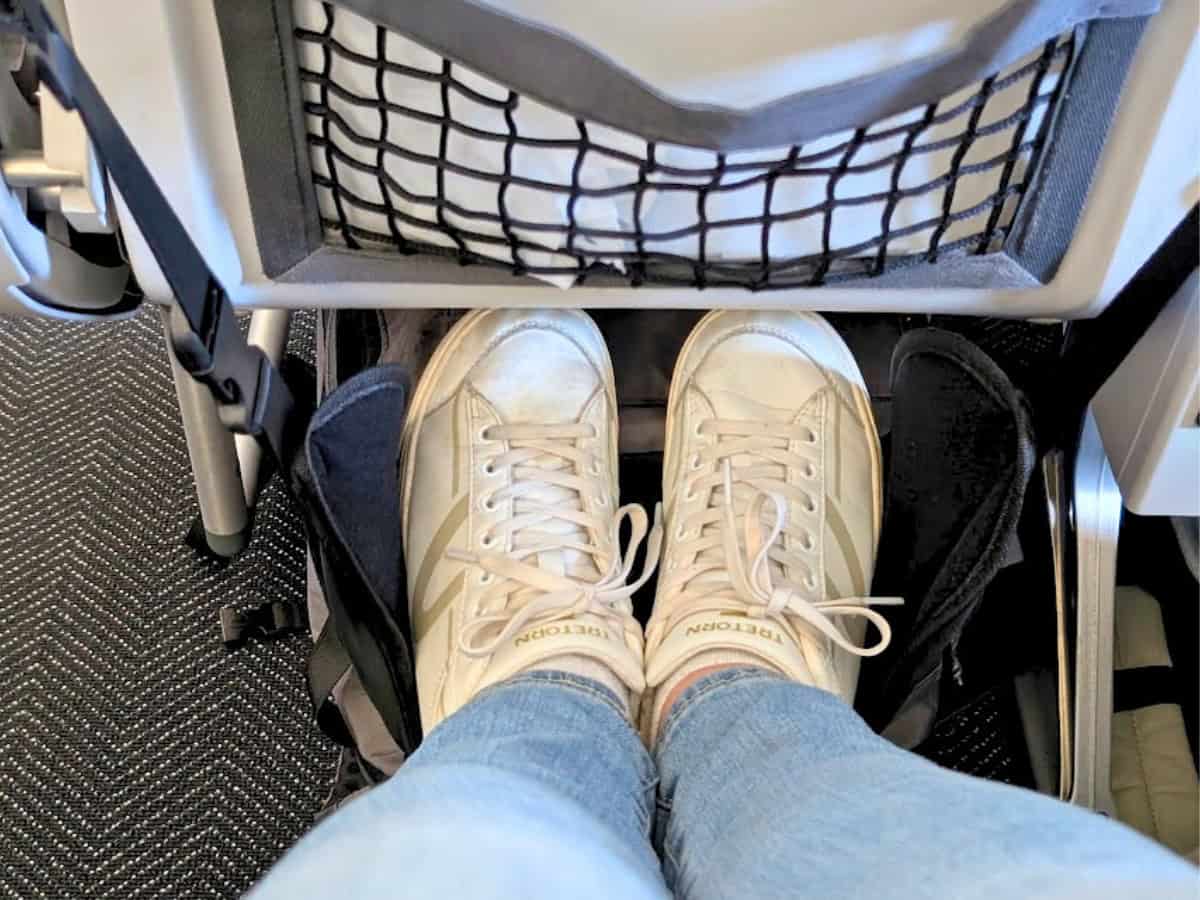
You simply hook the strap around the tray table, and it works with the tray table up or down. Set your feet inside and just relax.
It’s wide enough to fit both your feet at once, and the strap adjusts so you can have it hover where it works best for you. It comes in a little carrying case, so I slip it in there so my I don’t get any foot germs on anything else in my backpack.
Travel Compression Socks
Since you have incredibly long travel days to and from Patagonia, you also need compression socks to avoid circulation issues. I wear compression socks on any flight over four hours just to be safe, and the trip to Chile is many times that long.
The CEP Infrared recovery socks worked perfectly and helped keep me feeling good the whole trip. They have micro-minerals embedded in the yarn that help keep your temperature constant and improve blood circulation, and I actually gave away my old compression socks after wearing these.
Jet Lag Remedy
While Patagonia doesn’t have a big time difference from the States, the flight duration means you are likely not on your normal sleep cycle when you land. And if you’re me, you can’t sleep on a flight no matter what.
I have used this on more trips than I can count, and it works perfectly for me, my mom, my kid, and my friends I’ve traveled with. Usually, I use it when I travel across multiple time zones, but I’m glad I used it as I headed to Chile.
My travel on the way there was over 25 hours, and my trip back – with delays – lasted 32. Thanks to using the homeopathic jet lag remedy, I arrived ready to go through the end of the day I got there, and I slept through the night.
Neck Pillow
If you are lucky enough to sleep, or even if you just want to relax without stressing your neck, you need a neck pillow. In keeping with my strategy of minimizing space, I use (and love) a self-inflatable neck pillow.
It folds up when I’m not using it, and it has a built-in hand pump so I can discreetly inflate it without blowing it up. The cover is a soft plush, and the comfortable U-shape with a hump lets me use it in so many positions, depending on what I want at the moment.
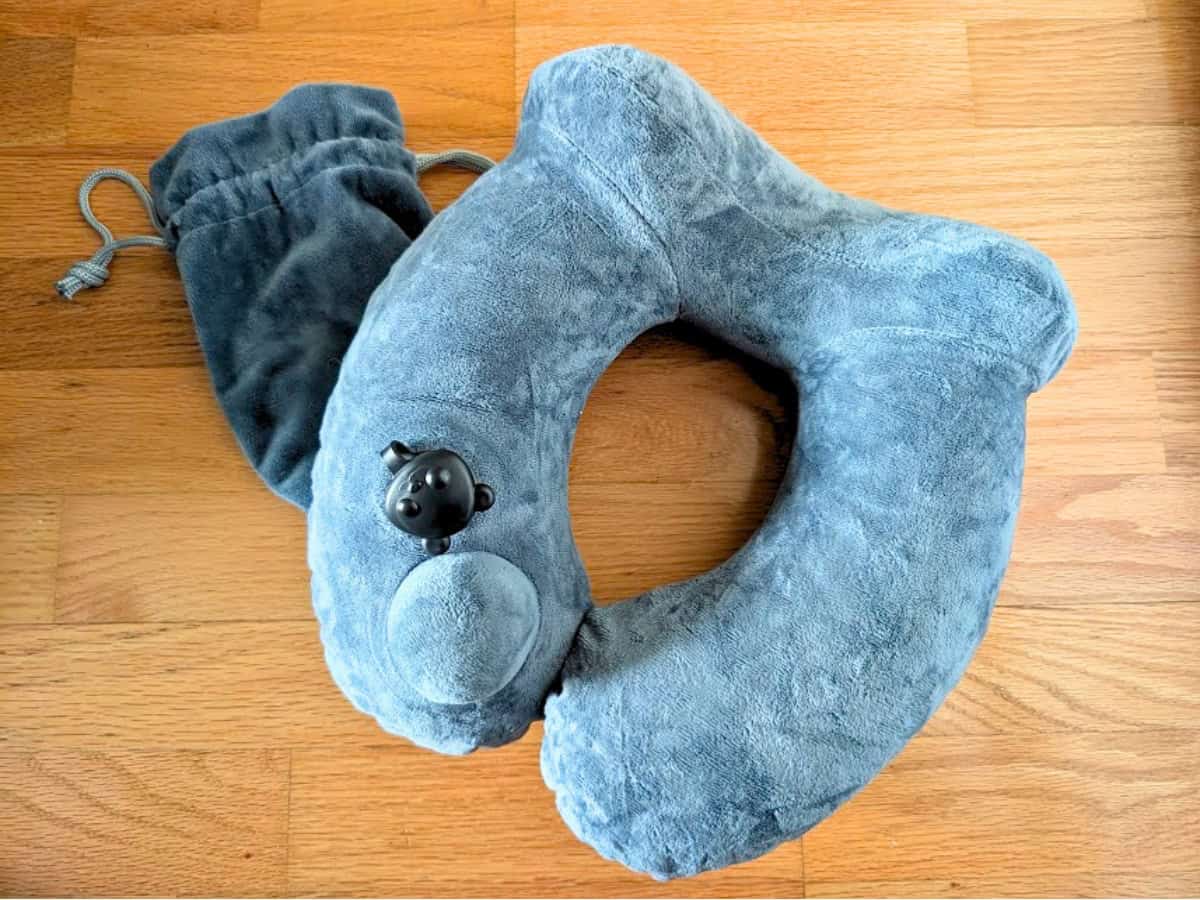
You can adjust the firmness pretty easily, too. And yes, it has its own carrying case for when you twist the air control and quickly release everything to put it away at the end of your flight.
Enjoying The Ultimate Edge Of The World Adventure
Packing for Patagonia requires a bit of strategy, but having the right gear makes the entire trip so much more enjoyable. When you have high-quality rain gear, smart layers, comfortable boots, and a well-organized daypack, you can focus completely on the stunning glaciers and wildlife instead of worrying about the weather.
I am a participant in the Amazon Services LLC Associates Program, an affiliate advertising program designed to provide a means for sites to earn advertising fees by advertising and linking to Amazon.com.